I have fallen behind already in my cookie resolution! It's been 2 weeks since I last posted; I'll see if I can keep to my vow of weekly posts for February. The cookie I'm putting up today is about the fastest baked cookie you can make - five minutes or less to measure and mix, 20 minutes, max, in the oven and done! It's not a great cookie for a Christmas tray because it's not a "pretty cookie", but it does make a good hostess gift, wrapped up in a cellophane bag and tied with a ribbon. It also makes a nice distraction for those munchers who might otherwise gobble up the cookies for your tray! I usually make a half recipe in a 9x9 pan, and I have used both the honey and the syrup. They're equally good, though the syrup is a little less sweet. I like mine baked to a deep golden brown; you can pull them out of the oven just as they turn brown and get a slightly chewy cookie (but one that's not nearly as good, in my opinion). I'd advise lining your pan with foil, because you may otherwise find that your cookies have become one with your pan. I use Reynold's Release foil, which makes cleanup a breeze. I found this recipe in a cookbook published by a local radio station. I have no idea who Jean might be, but I'm glad she decided to share her recipe!
JEAN'S GRANOLA BARS
1 stick butter
2/3 cup brown sugar, firmly packed
1 TBS. Golden Syrup (such as Lion Brand) or honey
2 cups Quaker Oats, quick or old-fashioned (I have only used the latter)
raisins, nuts optional
Melt butter, sugar and syrup or honey in a saucepan (I just put the butter in the pan and pop it into the pre-heating oven, then mix in the rest once it's melted).Add oats and stir to combine. Add raisins and chopped nuts as desired. Spread in a foil-lined 9x13" pan and bake at 350 for 15 - 20 minutes until golden brown. Cool slightly before cutting into bars, or (easier) allow to cool and break into pieces. Store at room temperature, not covered.

Tuesday, January 31, 2012
Friday, January 13, 2012
Cookie Tray Resolutions for 2012
 I RESOLVE TO: Always put baklava in foil cups. I ran out of foil cups this year and switched over to paper halfway through. The syrup soaked through the paper, leaked onto the tray and was sopped up by the neighboring cookies. I should have gone out and bought more foil cups.
 I RESOLVE TO: Forget the spritz cookies. They are nice looking, but they look a lot like manufactured cookies and they don't have anything "special". Try the recipe for key lime spritz cookies next year.
 I RESOLVE TO: Give up on the minty cookies other than the creme de menthe brownies. It's too much of a hassle keeping them from affacting the taste of other cookies on the tray and they're less popular than many of the others.
 I RESOLVE TO: Come up with a better system for laying out the cookie trays. Somehow I always end up with the heaviest cookies on top, and with some types of cookies completely buried under the others.
 I RESOLVE TO: Remember to set up a table by the freezer. I tried it this year, and it was a big help. I had a place to sit things when I was looking through my packed-to-the-top freezer.
 I RESOLVE TO: Wrap the cookies well. Cookies with a shortbread type crust don't last long when they are left out. Instead of getting hard, they get crumbly and fall to pieces when you pick them up.
  I RESOLVE TO: Keep trying new recipes. Some of the most popular cookies this year were new to me: Chocolate Euphoria Bars, Chocolate Marshmallow Bars and Butterscotch Bars. Tasty new recipes outnumbered the "eh, don't care if I never have those again" types.
I RESOLVE TO: Make lots of bar cookies - so much faster!

I RESOLVE TO: Post a new recipe or baking information at least once a week!
Saturday, December 17, 2011
Ribbon Jewel Cakes
These cookies are a pain to make, because of the multiple layers and because of the way the cake layers are baked - you turn a 13 x 9 cake pan upside and spread the somewhat sticky batter on that. It helps to have a good icing spatula that you can use to spread the batter and to spread the fillings. They are worth the trouble, though, because they look nice on the tray and they are yummy!
 RIBBON JEWEL CAKES
4 eggs
1 cup sugar
1 cup butter, softened
2 cups sifted flour
1 cup dairy sour cream
1/2 cup red raspberry preserves
1/2 cup apricot preserves

RIBBON JEWEL CAKES4 eggs
1 cup sugar
1 cup butter, softened
2 cups sifted flour
1 cup dairy sour cream
1/2 cup red raspberry preserves
1/2 cup apricot preserves
.
Bring eggs to room temperature. Preheat oven to 350. Separate eggs, placing whites into a medium bowl. Beat until stiff. Cream butter and sugar. Add egg yolks all at once; beat well. Stir in flour then fold in egg whites. Butter and lightly flour an inverted 13 x 9 baking pan. Measure 2/3 cup batter, spread with a spatula almost to the edge of the pan (a long icing spatula like the one pictured here works best). Bake for 7 - 10 minutes, until edges are lightly browned. Remove layer from pan to wire rack and cool (the icing spatula can slide under the layer, loosening it to slide it onto the wire rack). Repeat this baking process 4 more times. Assemble the cooled layers as shown in the illustration (beige = cake, white = sour cream, pink = raspberry and orange = apricot). Once the layers are assembled, cover the top layer with a sheet of waxed paper, then place the cake pan, right side up, on top of the pile. Put something heavy, like a large book or two bricks, into the pan and let it press the layers together for about an hour. Using a serrated knife, gently trim the edges into a smooth rectangle, then ice with confectioners sugar icing, using food coloring to make it pink. Let the icing set up for about 1/2 hour, then score the icing on the diagonal in both directions. Use these lines as your guide to cut the cake in even pieces. Store in an airtight container in the fridge for a week or freeze for up to 3 months.
Friday, December 16, 2011
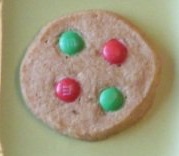
Chocolate-Covered Oreos
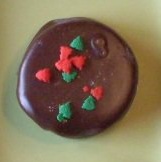 This recipe requires no baking, little prep time and just a few ingredients. They are one of the first cookies to be snatched from the cookie tray. By adding seasonal sprinkles, you can decorate them in about 30 seconds! If you keep Oreos and chocolate chips on hand. these are a quick dessert to take to a potluck or to serve with an after-dinner cup of coffee. The only way I can keep Oreos in this house is to hide them, and even then I don't always succeed in foiling the cookie thieves!
CHOCOLATE-COVERED OREOS
1 bag of Oreo Double-Stuf or Vanilla Oreo cookies
1-1/2 cups of semi-sweet chocolate chips, milk chocolate chips or white chocolate chips
1-1/2 TBS. solid shortening.
Seasonal or varied-color sprinkles (optional)
In a microwave-safe bowl with steep sides (the Pampered Chef batter bowls are perfect for this) melt the chips, stirring often. Add shortening (the bars of Crisco make it easy to measure amounts) and stir until it's completely melted into the chocolate, microwaving for short periods if necessary. Use a fork to drop one Oreo at a time into the melted chocolate, and turn to coat the entire cookie. Use the fork to remove the cookie, scraping the bottom of the fork across the edge of the bowl to remove excess chocolate. Place cookies on waxed paper to dry. If you use sprinkles, stop after every dozen or so cookies and sprinkle them on. If the coating in the bowl starts to harden, microwave it briefly. The cookies take a while to solidify; allow them to set up for at least 3 hours before packing into an airtight container. Cookies can be frozen up to 3 months.
NOTES:
1.) Chocolate and water don't mix. Chocolate that has been exposed to water will show "bloom", a whitish cast that spoils the look of the cookie, although it will taste fine and is completely safe to eat. I ruined one batch this weekend. They developed whitish pockmarks, and it took me a while to track down the cause - the steam from the dishwasher had wafted over them while the dishes dried. I made another batch, and the family made short work of the" ugly ones".
2.) You can very easily adjust the recipe to make a larger or smaller batch of the coating. Just keep the number of cups of chips is equal to the number of tablespoons of shortening.
3.) Be especially careful with white chips, stirring often. The white chocolate seems to have a very thin line between 'melted' and 'hardened'!
What's on My Cookie Tray?
Here's an updated list of the cookies I have made so far. Recipes for the ones marked with an asterisk can be found in this blog.
Raspberry Vinegar Cookies*
Lemon Gems*
Mini Fruitcake*
Coffee Snaps*
Chocolate Euphoria Bars*
Chocolate Marshmallow Bars
Apricot Jam-filled Bars
Peppermint Meltaways*
Forgotten Cookies*
Peanut Butter Blossoms*
Peanut Butter Cup Cookies*
Chocolate-Covered Double-Stuf Oreos*
White Chocolate-Covered Vanilla Oreos*
Thumbprints*
Orange Cookies
Chocolate-dipped Coconut Macaroons*
Mini Cheesecakes*
Baklava*
Chocolate Mint Dreams*
Iced Pumpkin Cookies
Oatmeal Chocolate-Covered Raisin Cookies
Chocolate Peanut Butter Surprises*
Ribbon Jewel Cakes*
Thursday, December 8, 2011
Coffee Snaps
 Coffee Snaps are the cookie that inspired me to experiment with getting sliced cookies to hold a nice round shape when cut, instead of flattening on the bottom as the knife is pressed through. I determined that freezing works best - firmer than refrigerated dough, but still not impossible to cut. I also tried mixing the coffee granules in differently. The original recipe calls for dissolving 4 teaspoons of instant coffee powder in 1 teaspoon of hot water; this makes a thick, sticky paste that doesn't want to mix with the rest of the ingredients. Adding the vanilla to the hot water before mixing in the coffee powder helps. Finally, a tip on the butter: let it soften completely! I tried to rush things, and ended up with a speckled appearance to the dough. They still taste good, but well mixed ones look like the one at left.
COFFEE SNAPS
4 tsp. instant coffee powder
1 tsp. hot water
1 large egg
1 tsp. vanilla extract
2 cups sifted all-purpose flour
3/4 cup unsalted butter, softened
3/4 cup sugar
1-1/2 tsp. baking powder
1/4 tsp. salt
Mini M&Ms, optional
In a bowl, dissolve coffee powder in hot water and vanilla. Add egg and beat into other ingredients, omitting M&Ms. Shape into two logs, about 1-1/2 inches on diameter (about the diameter of a 50 cent piece) and put in freezer until firm, 2 or more hours. Slice across log in 1/4" sections to make cookies. Place on an ungreased baking sheet; decorate with M&Ms. Bake in preheated 375 degree oven for 10 minutes, until edges are slightly golden. Cool 5 minutes on sheet then transfer to racks. Store airtight for up to 2 weeks or frozen for 2 months.
Wednesday, December 7, 2011
Triple Layer Brownies
Last night I made a double batch of Triple Layer Brownies, one batch with Creme de Menthe flavoring in the center and the other with Triple Sec. You can make a non-alcoholic version using a drop or two of peppermint extract or orange extract in their place. I tint the icing to "match" the flavor (althought if you use green Creme de Menthe, the alcohol with take care of the coloring too.) You can use just about any flavorful alcohol in the middle layer - Kirshwasser (red tint), Chambord (pink/purple). I haven't tried coconut or coffee flavors yet, but I plan to try them. Really - what doesn't go with chocolate?
TRIPLE LAYER BROWNIES
Brownie Layer
4 eggs, beaten
1 cup. sugar
1 cup flour
1-16 oz. can of Hershey's syrup (NOT the kind in the squeeze bottle)
1/2 tsp. salt
1 tsp. vanilla
Mix in the order given. Line a 13" x 9" pan with foil, preferably non-stick and pour in batter. Bake at 350 degrees for 30 minutes, or until a toothpick comes out clean. Cool on a wire rack. When the brownie is cool, remove it from the pan , keeping it on the foil.
Filling Layer
2 cups confectioners' sugar
2 TBS. Creme de Menthe or other flavored liqueur
1/2 cup butter, softened
Food dye (optional; gel types work best)
Mix thoroughly and spread evenly on the cooled brownie
Topping Layer
6 oz. semi-sweet chocolate bits
6 TBS. butter
Microwave until melted, stirring every 30 seconds (chips hold their shape and can look deceptively firm when they are actually melted). Pour the topping evenly over the filling and cool.
The chocolate sets up about as firmly as a ganache, so it's difficult to cut this into bars that will look nice. I score the topping layer first, then cut one row at a time with a non-serrated knife, wiping the blade clean after cutting each row. Try to press through the cookie, rather than sawing or dragging, which will pull the topping along with the blade.


Subscribe to:
Posts (Atom)